
Things you’ll need:
Shur-line edger (the one with wheels that can be attached to extender pole)
Duct Tape
Paint Brush
Paint pan that is wide enough (see the metal pan bought from Home depot) – you’ll need to be able to easily fit the shur-line edger in there flat so test it out before you buy the pain.
Extender pole for painting
Paint roller (that can be attached to extender pole)
Trim roller (that can be attached to extender pole)
Ladder (we borrowed an extra tall one from my husband’s dad)
Here’s a picture of the tall wall (this was the finished result):

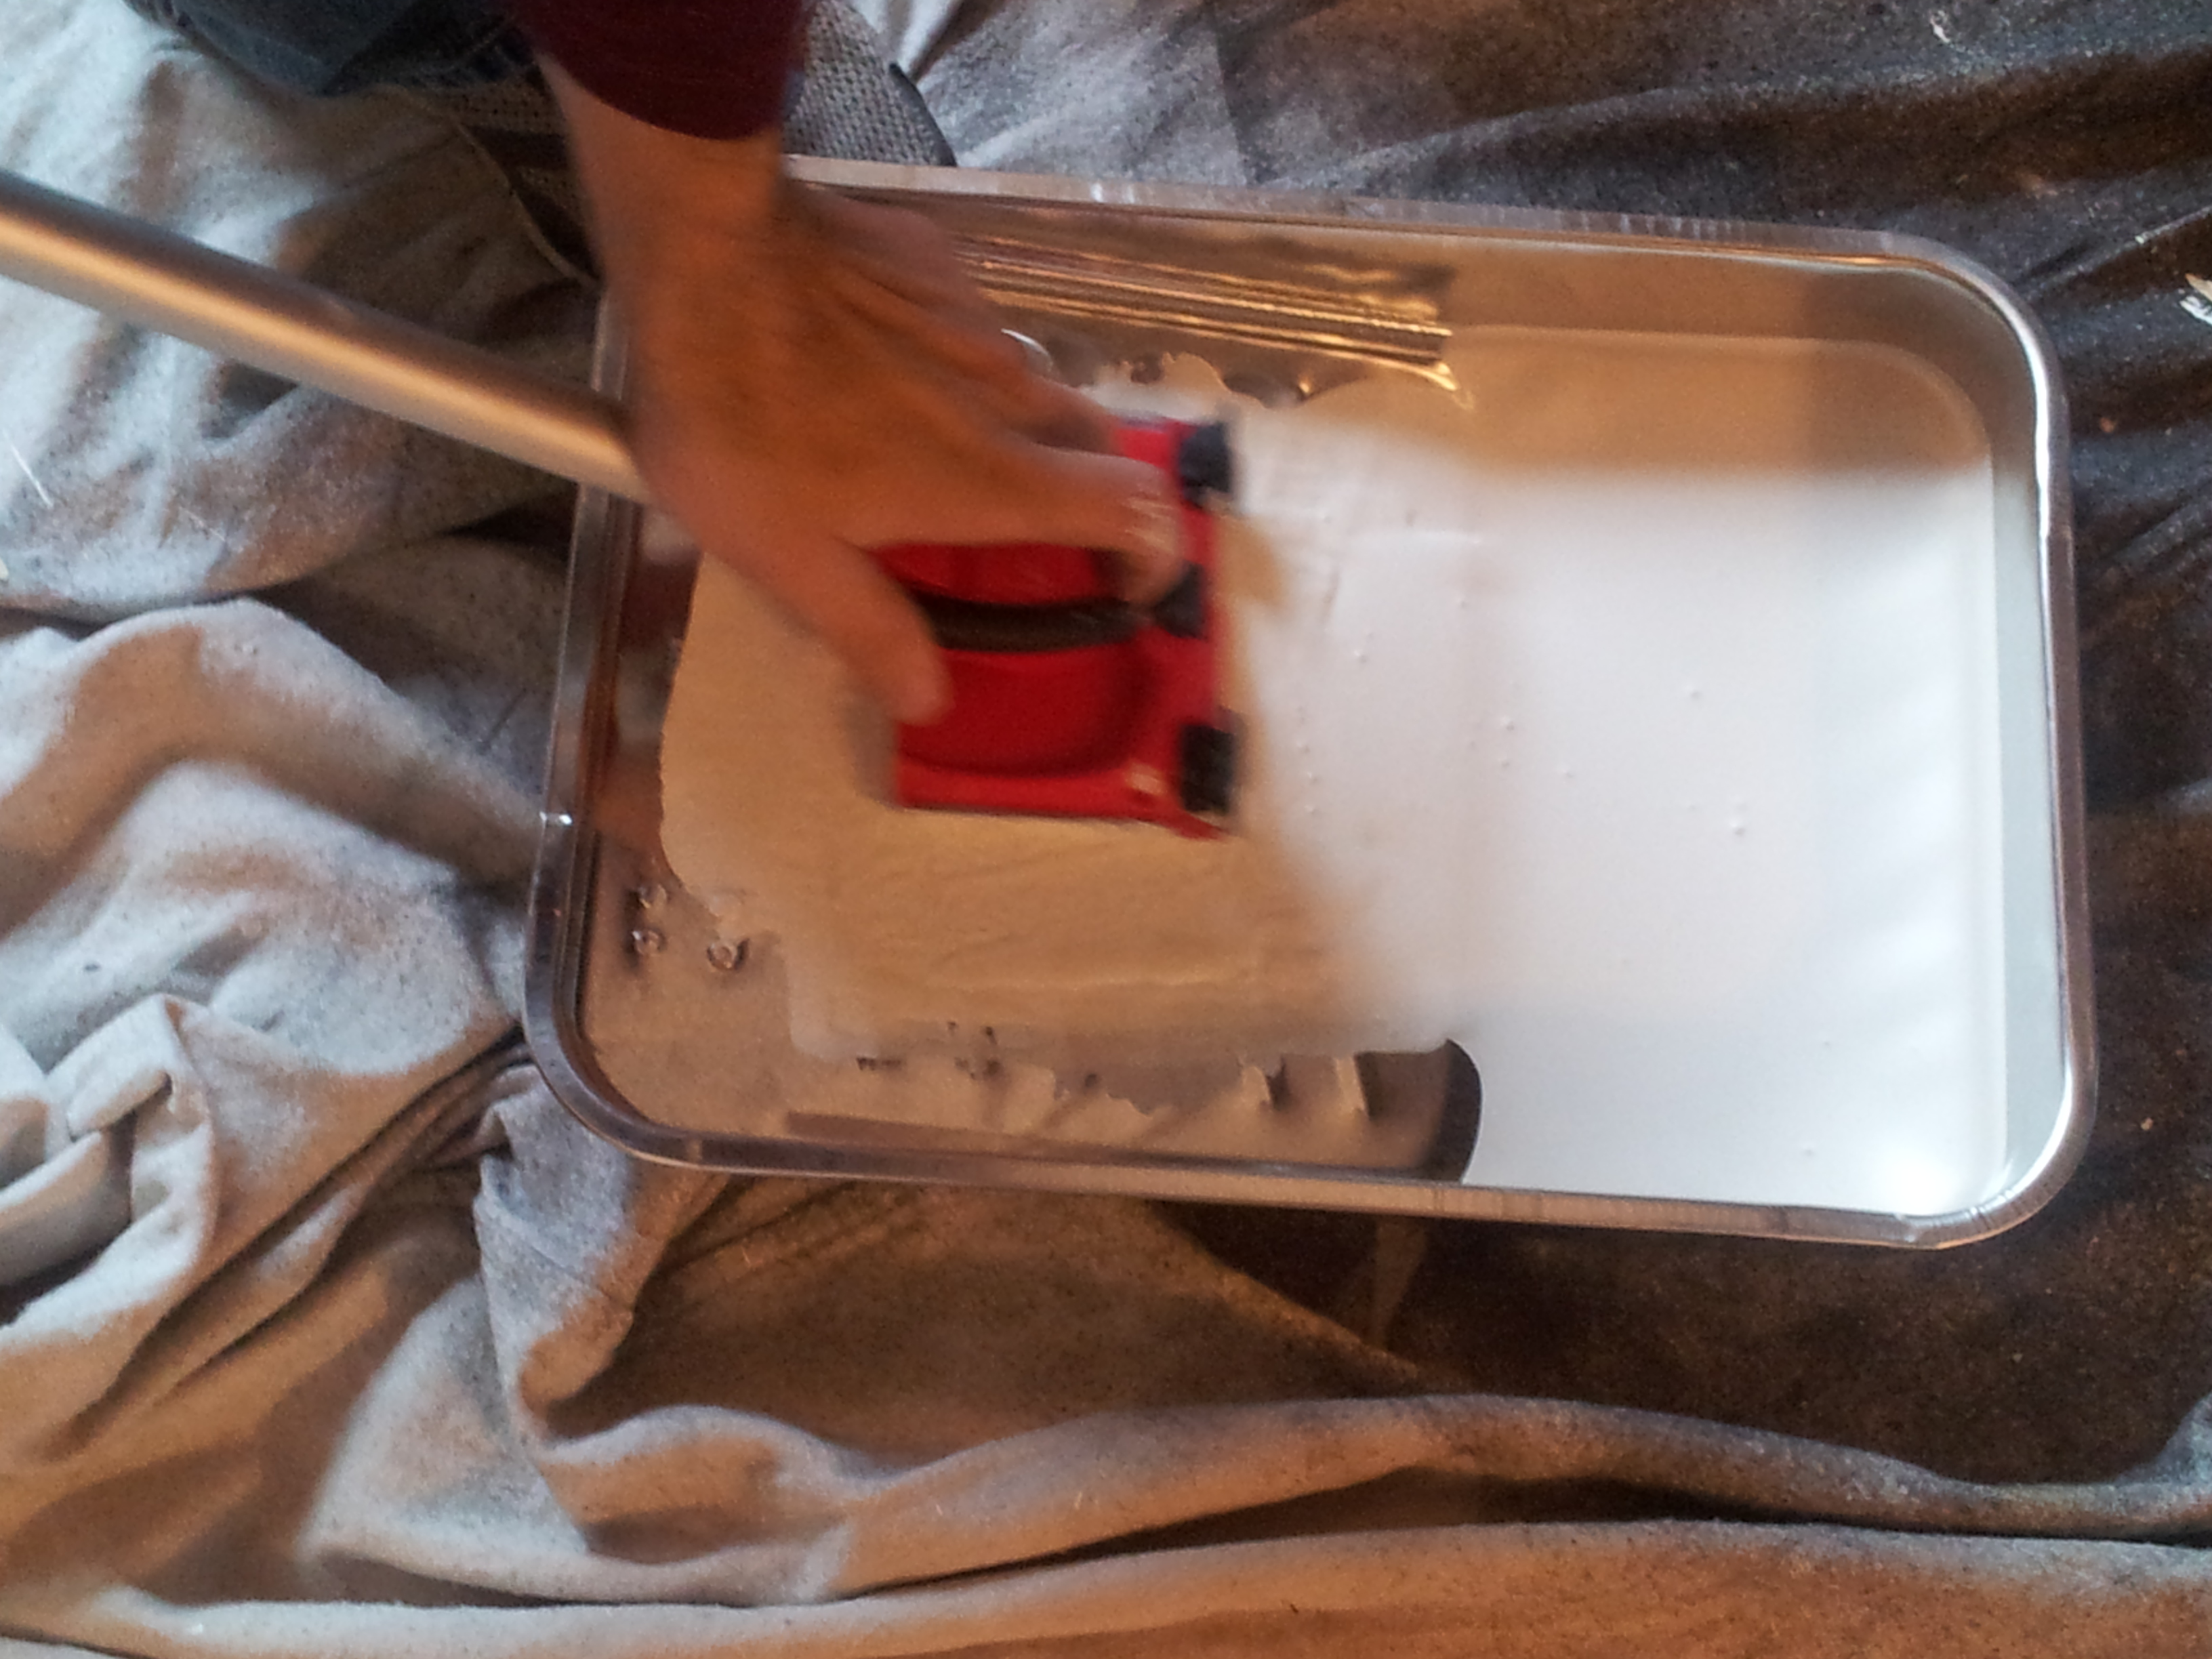
We rolled the walls with a roller and extender pole which got significantly harder the higher you got on the wall b/c you don’t have as much control on the highest parts and you can’t put as much pressure. Then, we were left with the edges and the corners of the wall to do. We bought this Shur-Line Edger from Home Depot (the one with wheels) and this metal pan b/c the paint pan we had wasn’t wide enough for this edger So, you rest it in the paint and then you need to squeeze some of the paint off, especially at the upper edge near the wheels. This is very important b/c if you have too much paint near the wheels it’s going to squeeze off onto the ceiling.

This is what your edger should look like. See how there is less paint at the top?:

It should not look like this:

Now, push down the ceiling protector:

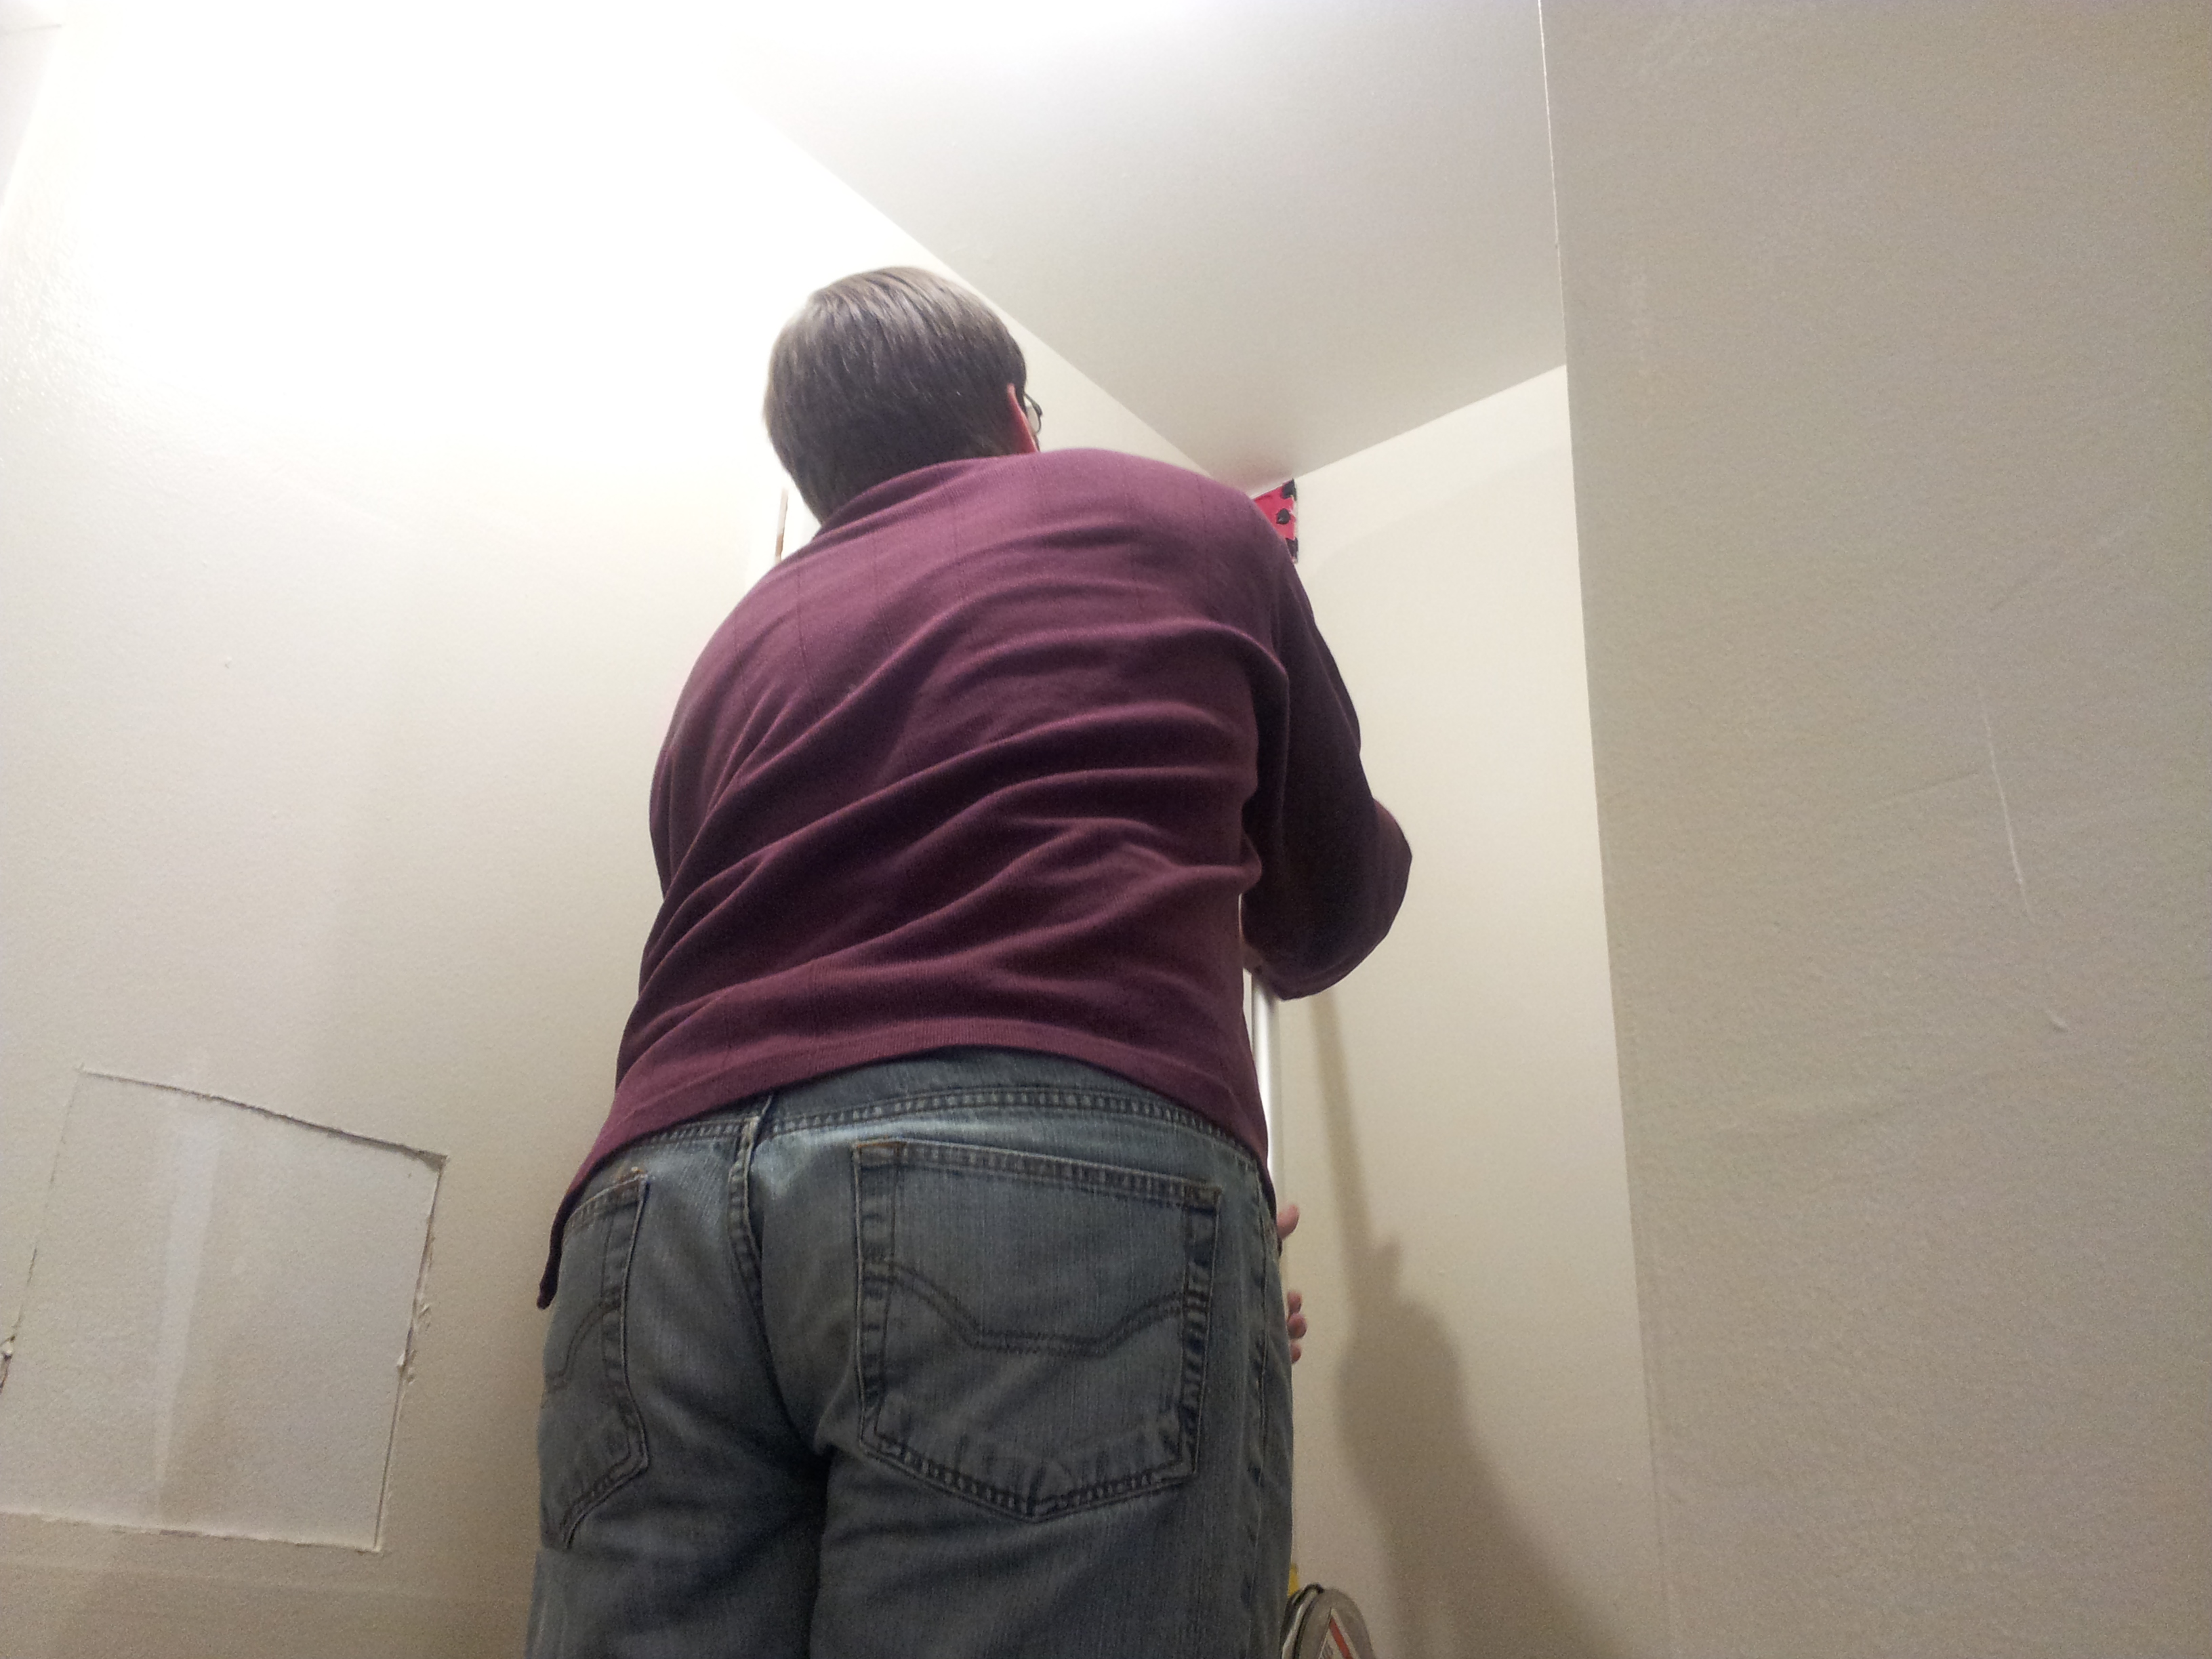
And edge away! The important thing is to move this thing side to side, not up toward the ceiling or again you will push paint up over the wheels and that will get it on the ceiling.
 And make sure you are clinching your butt cheeks just perfectly as seen here.
 Sorry, I couldn’t resist that one. But seriously, my husband did use a ladder for this b/c you can have more control over the edger this way, but there were areas on the stairs where he couldn’t use a ladder and it still worked out fine. But make sure you practice before you try it on a hard to reach area. It takes some trial and error to get used to the way it works. This is something I didn’t do in the front common area and I did get it on the ceiling in places – woops! Again, I’m still working on my impulsivity and impatience.
And then for touching up, I duct-taped my favorite paint brush to the extender pole and touched up some of the corners, etc. The edger doesn’t work as well in the corners – the head of the edger actually rotates to do the corners, but we just didn’t think it worked as well as it did near the ceilings – mostly the corners had to be touched up. My husband used a trim roller (see pic below) in the corners also – this worked better for corners. And we’ve just seen that they have corner rollers at Home Depot though we didn’t try them – worth a try next time.
