
We had two tenants move out in one year so it’s been a busy year for us. We knew we wanted to update the kitchen in this unit b/c the cabinets were original and pretty grimy inside and out. It would’ve taken quite a bit of work to get them up to par and in the end might have ended up costing only a little less (in effort + money) than all new and wouldn’t have been exactly what we wanted anyway so we just bit the bullet. Here’s some before pics of the kitchen:


Don’t you love the Aztec chickens on the backsplash?!?
So, the more I hung out in this kitchen, the more I realized that the fridge was just seriously in the way. It bothered me so much that I hired a plumber to move the water line (for the ice maker) to the other wall. It was a challenging job – he had to re-route the water line from the basement all the way up. This apartment is on the second floor so he had to go through the first floor tenant’s apartment as well. He basically hooked up all 4 apartments at the same time which was awesome and he finished it all in one day!
In the future, or if tenants want to move their fridge now they are able. Rick Littleton at Plumbing Masters is who we used. We had other plumbers come out to give estimates but they had not-so-good ideas about moving the water line within the apartment through the walls for the same price. I guess they were just intimidated or didn’t know how to run it all the way up from the basement – not sure but so glad we hired Rick Littleton – I highly recommend him. This way, we got it fixed up for all the apartments and not just one. We also had him replace the waste arm for the kitchen sink b/c it’s an old building and just has old pipes and that’s recommended when redoing the kitchen since if it leaks later, you’d have to rip up the whole kitchen again to fix it – that wouldn’t be good.
We had to have an electrical outlet added on that wall as well for the fridge. So, we went ahead and did this in all the units also.
We also didn’t like the wall stove and we wanted to have a built in microwave. And what about that hideous light fixture above the sink built right into the backsplash? No, no, no. It was all just a bit too much so we hired Affordable Kitchens and Baths in St Peters, MO to help us. They were so helpful and the price was right. Hopefully, this kitchen lasts a long time – time will tell.
We ended up using Express Granite in St Peters to do the granite countertops b/c they had a better price, but Affordable did everything else. My husband and his dad did the demo work before hand.
We repainted the walls in Gracious Greige by Lowe’s HGTV, changed out the ceiling fan b/c the old one was covered in grease and the dust from construction just stuck to it like glue (tarred and feathered, it was) – it was going to take more time to clean it (time is money) than just spending money on a new one. My husband did the baseboards. I repainted the trim and the back door (Behr – Polar Bear – this is what we use for all our trim and doors). We put new blinds. I used grout renew (oyster gray) and repainted/sealed the grout after cleaning them thoroughly with a grout brush (see other post about how I screwed it up at first with an oxiclean solution). And wallah!:


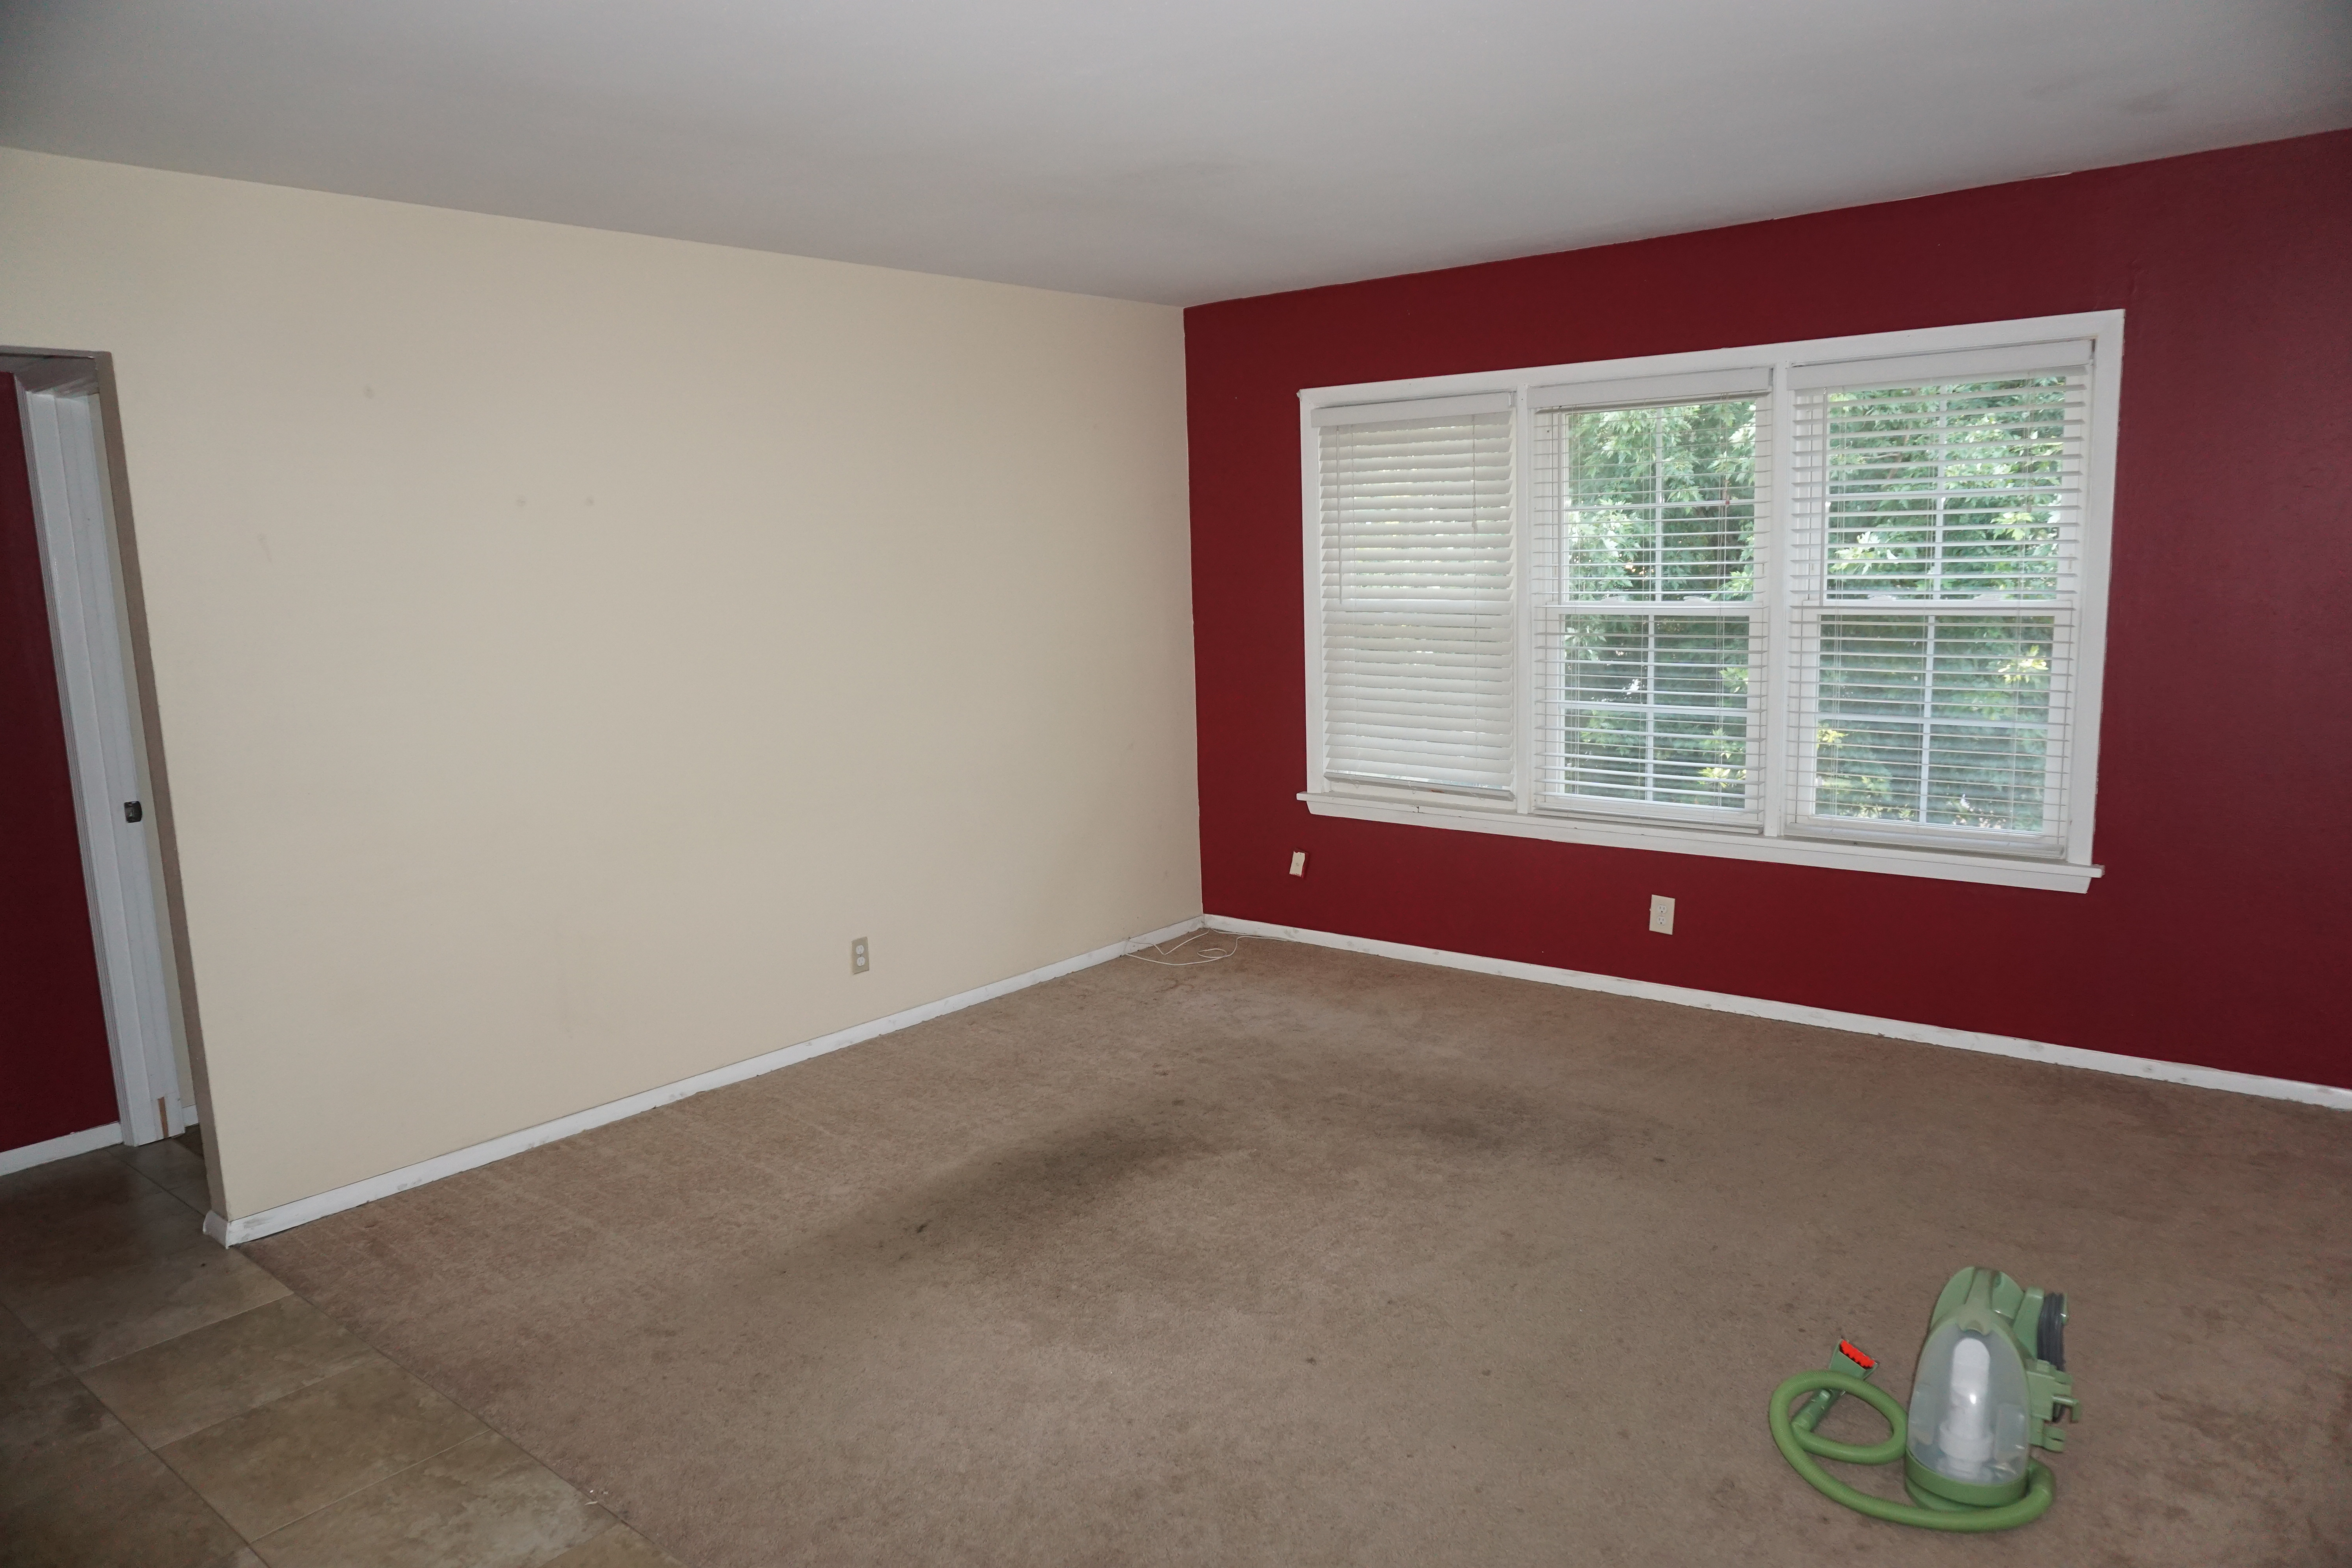
Dining Room/Living Room (Before Pics):

There’s my kids! 🙂 We removed the cowboy doors to make it more open between the dining room and the kitchen and I repainted the door trim but didn’t replace it. I repainted the walls in the dining room and the living room (Behr – Sandstone Cove). And we replaced the carpet in the living room – had Home Depot do this. We also replaced some of the air conditioning vents b/c the previous tenants painted them and just found it easier to replace. And of course, new base boards. The living room didn’t have a light fixture – we had the ceiling fan added with light fixture.
Dining Room /Living Room (After Pic):

Hallway (Before):

We repainted this hallway (Behr – Sandstone Cove) and the old-fashioned light fixture had broken glass, so we needed a square 9 x 9 piece of glass to fit into it. I almost had a piece of glass made but then we went to the Home Depot and they had some hard plastic that they recommended using so we used that instead – Bryon was able to cut it with a box cutter and fit it in – it had a textured pattern as well which looked nice. Then, we got some white spray paint and sprayed the metal fixture white b/c it had gotten scratched up during the transporting process in the car (kids stepped on it repeatedly…). I can’t seem to find my picture of that fixture b/c it must’ve gotten lost the day my phone died. I did have to repaint that 6-panel door at the end of the hall as well b/c it was pretty dinged up. No “After” pic for the hallway. 🙁
Master Bedroom (Before Pics):


The previous tenants had an A/C unit in the window – this is what made us decide to put ceiling fans in all the bedrooms – it’s a second floor unit and I think ceiling fans should be pretty standard in second floor units. They can run on the warmer side.
A couple of years ago, Bryon also got up in the attic to check on the A/C connections and it turned out that the A/C duct work was not hooked up properly (like, not even connected – I’m not sure how the previous owners didn’t catch this (well I guess I know how – nobody likes going in the attic – including the A/C company) – no wonder the tenants were hot) so he reattached the duct work and we got a recharge in the A/C unit – our plumber was also certified for HVAC so he did the recharge for us.
We also replaced the carpet in this room, the blinds, and the baseboards, as well as a fresh coat of paint on the walls and window trim. As you can see, the closet shelving is really old – I think it must be original, so my husband replaced the shelving with a more modern wire racks and we decided to put two racks on each side so that the new tenants can hang more clothes. I repainted the closet doors and we had to put a new closet door knob on the one side. That’s about it for this room.
Master Bedroom (after):


Master Bathroom (After):

Luckily, we didn’t have to make any updates to the master bathroom besides a fresh coat of paint (Lowe’s HGTV’s Basalt Powder – not my fave, but it will do). We really wanted to add a new vanity instead of the pedestal sink so that they could have some kind of storage in this bathroom, but we ran out of time and motivation. :-/ I love the tile work in there though – that was done by the previous owners.
Second Bedroom (After):

I guess we didn’t take any before pictures of this bedroom b/c this is where we stored all of our stuff throughout the renovation. We did have to replace the carpet and do a significant amount of work spackling the walls. We repainted the window trim and walls, added a ceiling fan, updated the closet shelving, new blinds, new baseboards. And I think that’s all.
Third Bedroom (Before):


The wood floor was nice but they had these unattractive stickers all over them. 🙁 We decided to do the easiest thing and carpet over them. It was a shame b/c we would’ve loved to leave them wood – the girls called it the penny room b/c they found a penny in it and also the dots all over the floor looked like pennies. :-p One wall was wood paneling – we just repainted all the walls with Lowe’s HGTV Stone Isle – I love that color very much and it looked so nice against the white trim. We replaced the blinds, updated the shelving in the closet, new baseboards, painted the window trim and the door to the room. I also painted the ceiling in this room b/c it was pretty bad off.
As you can see, there’s a lot of wires in the corner. The guys that lived here previously were three college guys and they paid extra to have Cat 5 lines running through each room – this way they could each get very high speed internet. Unfortunately, it was an eye sore. So Bryon debated between cutting the lines or taping them to the wall or … In the end, he decided to keep the functionality but instead he put Cat 5 (ethernet) outlets on the walls in the closets of all the bedrooms and in the living room so that any future tenants would have the option of hooking up the lines without the need to drill new holes in the walls or they could not. The Internet comes in the apartment through the master bedroom closet so future tenants could just use wireless and not have to have these ugly lines running through each room. Anyhoo, we left the option and just put outlets on the walls so they could hook it up if they want but we guess most people won’t want that.
Third Bedroom (After):

Hall Bathroom (After):

Only thing we did to this bathroom is paint the walls in Lowe’s HGTV’s Icy Avalanche. This is not my favorite color but it was good enough. It’s a very manly color though so I think guys will like it. Oh, and we added a new curtain rod.
Common Area (Front):
Well, as if renovating one unit wasn’t enough. We wanted to add more work for ourselves. :-p The front of the building walking up to the apartment hadn’t been updated in a looong time and it showed so we really wanted to make that look nicer. I wish I had before pictures, but I don’t. 🙁
Downstairs Common Area:


Upstairs Common Area:

We had new carpet put down. Shout out to HomeTown Floors in St Peters, MO! They rocked the house on this one. Bart came out to meet with me several times to make sure I had what I wanted. He helped me pick out the type of flooring – this is a commercial carpet in dark gray. And the installer David and his wife, Matilda, were such an amazing team. They worked their tails off to finish the carpet in one day and it was a pain to get around this banister – let me tell you. The previous owners didn’t have carpet up here for that reason, but he did such a great job. We love the end result.
We repainted the walls in Lowe’s HGTV’s Stone Isle – my new favorite color. And I made some magnet boards/bulletin boards (couldn’t resist the opportunity to make more magnet boards! :-p). I figure why buy boring art work when you can have magnet boards!! ooh La La! :-p The downstairs has 2 dry erase/magnet boards and a bulletin board in the middle. The upstairs are 2 tack boards and one magnet board. I have a blog post on how to make the tack boards as well.
Cara (my 6 year old) actually made the yarn design on the left and I made the one on the right. I like Cara’s better. I think these tack board patterns could be a good representation of each of our minds – see how mine is all tangled up and chaotic? – my brain feels just like that. There’s also a picture of the mailbox – my husband added some trim around it – it was an eyesore before with jagged wood all around the mailbox from when they installed it.
Common area (Back):


Again, double shout out to HomeTown Floors for rocking out these back stairs in only one day!!!!!!!!!!!!!!!! Did I mention that I love them? David and Matilda again rocked it out. Bart helped me pick out the flooring type and coloring to match the paint. These stairs used to have metal (gold) treads on them that were sooo loud. It was like someone was beating a metal can 20 times every time someone went up and down the stairs. If you wanted to be inconspicuous, you’d have to make like spider man up the stairs.
So, Bart had this idea to use rubber treads and it is so quiet now! Not to mention, it looks so much better and it’s so easy to clean – just sweep and damp mop after. The rubber treads sweep off really easily which I was kind of concerned about – I thought stuff might get stuck in there, but it doesn’t – just sweeps off.
We also painted the walls back here (Behr’s Vintage Linen) – it’s a neutral, off-white sort of color – very warm – I like. And it goes well with the flooring – thanks Bart! These walls were a challenge to paint though. They used to be a glaring white color with lots of dings and stains. But these walls are extremely tall in places so I really did hesitate to paint them until the very end. And my husband helped. I have a separate blog post on how we were able to paint the tall walls so check that out.
Another thing my husband did, was update the trim around the furnaces. It was basically one of those eyesores that needed to be fixed. Rule of thumb in rentals – if it’s an eyesore, fix it. A piece of the trim was missing and we couldn’t match the trim at Home Depot or Lowe’s so my husband thought – no big deal, I’ll just buy all new trim and update the whole thing. Which normally it wouldn’t be a big deal but as we know with renovating that even the smallest of things has the potential to turn into a big thing. (Makes you think extra hard about even replacing a towel rack lest the whole wall fall down, eh? :-p)
Well, after he started removing the trim the door frame basically fell out. It turns out that the door frame was being held in place by the trim.. So, a new project began of installing the door frame which involved a lot of shimming and working around odd shaped jutting out sheet metal while on an extra tall ladder above stairs – so not fun!
And, of course, I had to get up there and dust those furnace doors which hadn’t been dusted since 1969 – no joke.. I sort of re-realized that I am scared of heights – a fact that I take for granted on a day to day – especially on a shaky extra tall ladder at the top of a flight of stairs but I had to get that very last dust bunny.
After he got the door frames secured, finally the trim project could begin. Are we done yet? Not yet, then he needed to install new baseboards.
In the garage, we installed a new garage door opener.
In the basement, my husband patched up some holes that were made in the plaster when the plumber put in the new fridge water lines. Turns out, working with plaster is not too easy either. I still haven’t found anyone who will replace the holes in plaster in the basement garage where we had to replace some pipes – one guy sent me a stone-faced email: I’m sorry, but I cannot help you with your plaster project. 🙁 I get it.